
Want to avoid holiday hassles and potential fire risks? Inspect your Christmas lights before plugging them in. Damaged strands can cause electrical shocks, fires, or simply leave you frustrated when they don’t work. Here’s a quick five-step guide to ensure your lights are safe and ready to shine:
Pro Tip: Switch to LED lights – they use 90% less energy and last up to 25,000 hours. Safety and preparation ensure your holiday display is both beautiful and worry-free. For inspiration, explore holiday light displays to see what’s possible.
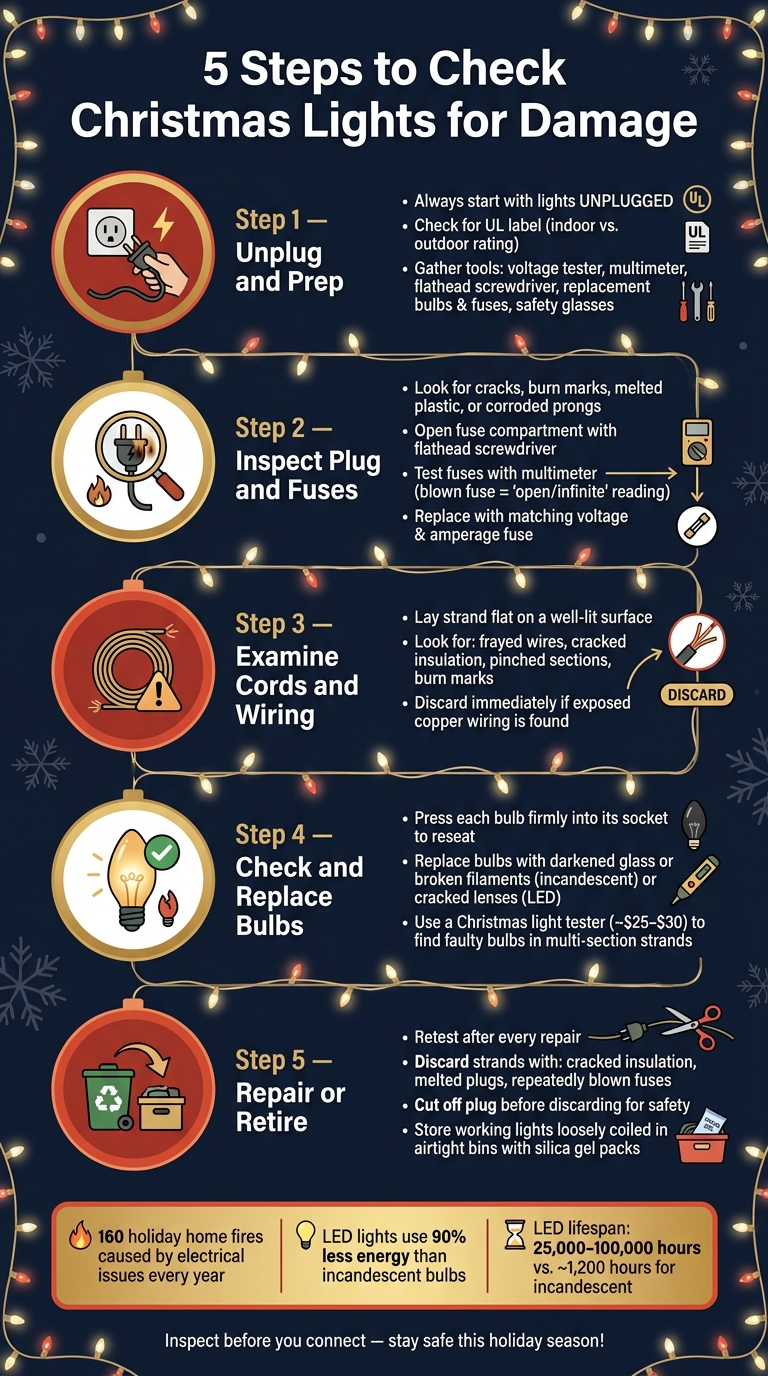
5 Steps to Check Christmas Lights for Damage
Before you start handling any bulbs, make sure the strand is unplugged. This step is absolutely essential for your safety. As home improvement expert Bob Vila advises:
"Note that for your own safety, before attempting to fix them, check twice that the lights are unplugged."
Also, ensure both your hands and the work area are completely dry. Once these safety measures are in place, you can move on to checking the light strand’s ratings.
Look for a UL (Underwriters Laboratories) label on the back of the strand. This label indicates whether the lights are rated for indoor use only or both indoor and outdoor use. Outdoor-rated lights are built with weather-resistant materials and sealed connections to handle moisture and temperature changes. Indoor-only lights lack these protections, and using them outside could lead to cracked insulation or corroded connections, posing a serious fire hazard. If you can’t locate a UL label or the rating isn’t clear, it’s best to assume the strand is for indoor use only. After confirming the ratings, set up your workspace and gather the tools you’ll need for inspection.
Lay the light strand out on a clean, flat, and well-lit surface. Then, collect the following tools to ensure you’re ready for the inspection:
| Tool | Purpose |
|---|---|
| Non-contact voltage tester | Identifies electrical current without needing to touch exposed wires |
| Multimeter | Checks continuity and helps locate faulty bulbs or fuses |
| Small flathead screwdriver | Opens the sliding fuse door on the male plug |
| Replacement bulbs and fuses | Allows for immediate repairs during the inspection |
| Safety glasses | Shields your eyes from potential glass shards if a bulb breaks |
For those who frequently deal with holiday lights, the LightKeeper Pro is a highly recommended tool. Electricians often suggest it for diagnosing circuit problems in both incandescent and LED strands.
Unfortunately, not all damage can be repaired safely. If you notice any of the following issues, it’s better to discard the strand rather than attempting a fix:
Additionally, you should consider retiring any incandescent strand that’s more than 10 years old. Even if the lights seem to work, the insulation and internal components degrade over time. Upgrading to LED lights is a smart choice – they’re far more efficient, using up to 90% less energy than incandescent bulbs, and they last significantly longer, with lifespans ranging from 25,000 to 100,000 hours compared to about 1,200 hours for traditional bulbs.
Step 2 is all about checking the connector components of your light strand. These parts are the bridge between your decorations and your home’s electrical system. Even if the rest of the strand looks fine, any damage here could pose a risk. So, with the strand unplugged and your tools ready, let’s dive in.
Start with the male plug. In good lighting, look for cracks, broken plastic, or loose metal prongs. Also, check for burn marks, discoloration, or melted plastic – these are red flags for overheating or internal shorts. If you spot melted areas, it’s safer to discard the strand rather than attempt a repair. For corroded prongs, clean them gently using an electrical-safe cleaner and fine-grit sandpaper to restore their connection.
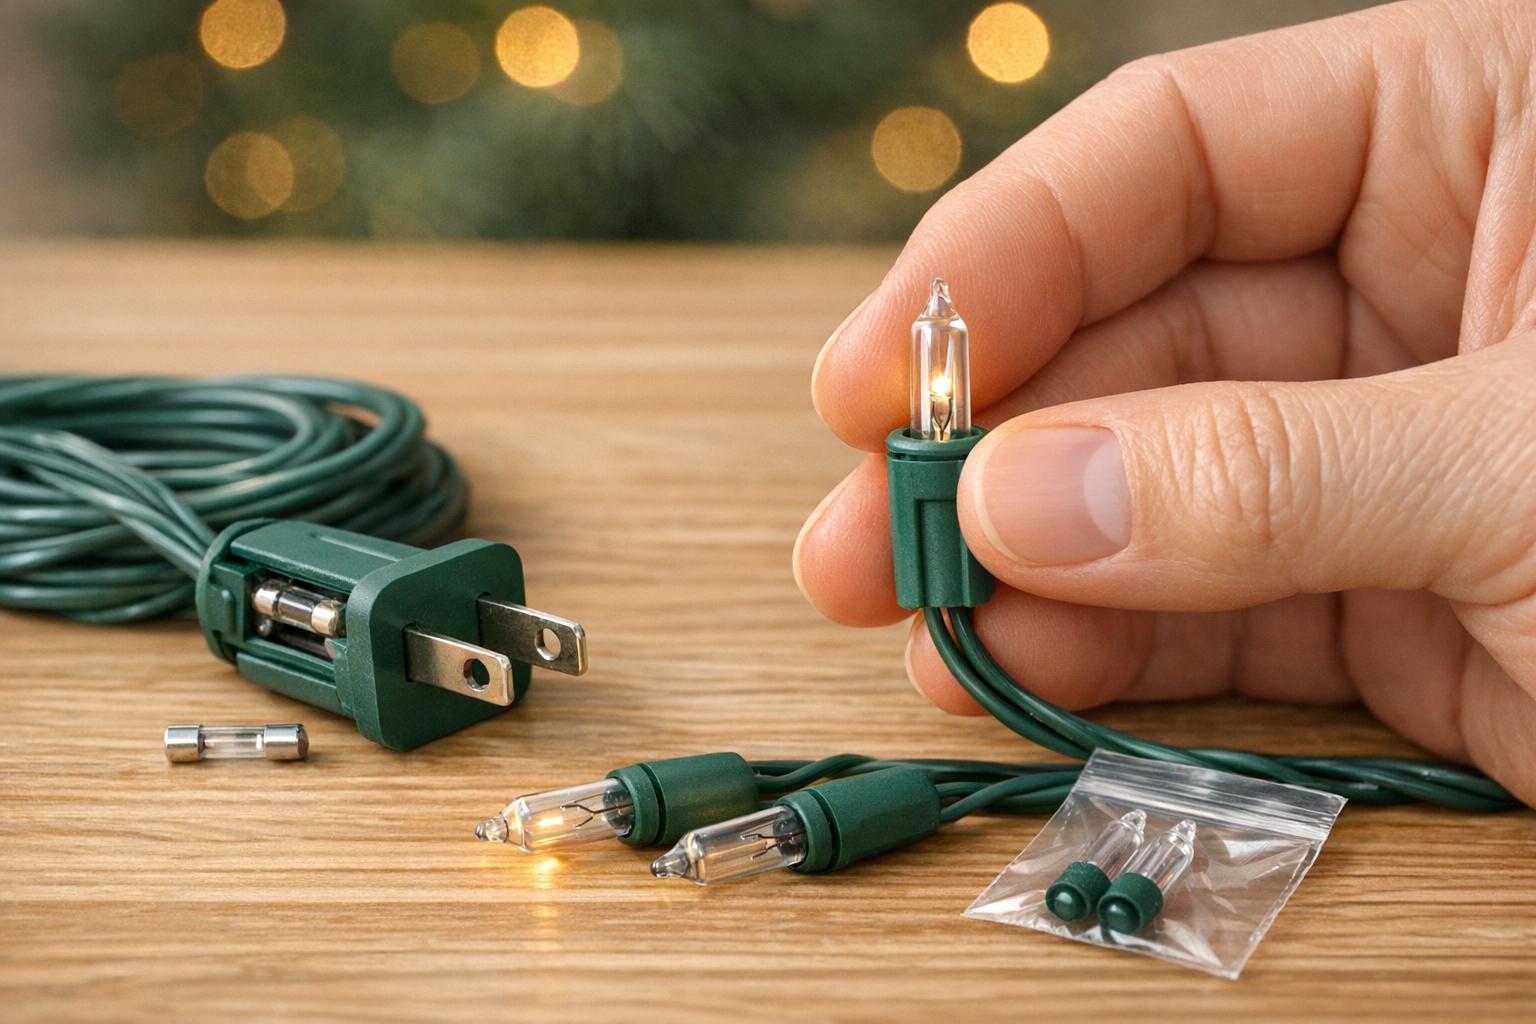
Next, find the small sliding door near the prongs – this is the fuse compartment. Use a flathead screwdriver to open it. Inside, you’ll typically see one or two tiny glass fuses, usually rated for 3 amps.
If a fuse is blown, you’ll notice a dark patch or discoloration. If it looks fine but the lights still don’t work, test it using a multimeter set to ohms (Ω). A working fuse will show a numerical reading, while a blown one will read "open", "infinite", or zero. Always replace a blown fuse with one that matches the original in voltage and amperage to avoid fire risks.
If the new fuse blows immediately, it could indicate a bigger problem, like a wiring short or overloading from connecting too many strands. In this case, it’s better to retire the strand instead of repeatedly replacing fuses.
Once you’ve checked the plug and fuses, make sure the outlet is functional. Plug in a lamp or another device you know works. If there’s no power, the outlet might be controlled by a wall switch or a tripped circuit breaker.
For outdoor displays, always use a GFCI (Ground Fault Circuit Interrupter) outlet. This type of outlet is designed to cut power automatically if it detects moisture or a fault, which is especially important in wet conditions. If your GFCI outlet isn’t working, try resetting it or testing another GFCI outlet nearby.
Keep in mind, a standard 15-amp circuit in the U.S. can handle around 1,400 watts, while a 20-amp circuit can support about 1,900 watts. To avoid overloading, electricians suggest using no more than 80% of a circuit’s total capacity. If you’re running multiple strands, add up their wattage to ensure you’re within safe limits.
Once you’ve checked the plug and fuses, the next step is to carefully examine the cords and wiring to ensure everything is in good shape.
Lay the strand flat on a well-lit surface. This makes it easier to spot any kinks, tangles, or tight bends that might be hiding damage. Straightening out the cord also helps prevent further stress on the wiring.
Go over the entire length of the cord, looking closely for any breaks in the outer coating. Frayed or cut wires, cracked insulation, or exposed copper are major red flags. If you see any of these, it’s time to toss the strand – don’t try to fix it.
Be on the lookout for flattened or pinched sections, which can happen if the strand was secured with metal staples or wound too tightly during storage. Melted or discolored areas are another warning sign, often pointing to overheating or electrical arcing. If you notice these, discard the strand immediately.
Deane Biermeier offers this straightforward advice for handling damaged cords:
"If you find frayed wires, damaged sheathing, or cracked sockets, discard the entire strand and replace it for safety, regardless of whether or not the lights work." – Deane Biermeier, Contributing Writer, Angi
Take a close look at each bulb socket. Cracks in the plastic, loose fittings, or dark discoloration can all indicate underlying problems. The table below outlines common signs of damage and their potential causes:
| Sign | What It Looks Like | Likely Cause |
|---|---|---|
| Frayed or cut wire | Exposed copper, torn coating | Aging, bending, or animal damage |
| Pinched insulation | Flattened or pierced sections | Metal staples or tight storage winding |
| Electrical arcing | Burn marks or smoky discoloration | Overloaded circuit or moisture ingress |
| Loose socket connection | Flickering when bulb is moved | Worn socket contacts or poorly seated bulb |
If you don’t find any visible damage but the strand still doesn’t work, try using a non-contact voltage detector to pinpoint the issue. It’s a handy tool for troubleshooting electrical problems without taking unnecessary risks.
After clearing the wiring, it’s time to focus on the bulbs. Often, these are the culprits behind malfunctioning strands. Even a single loose or burned-out bulb can take down an entire section.
Start by unplugging the strand. Then, press each bulb firmly into its socket to ensure it’s seated properly. This simple step can often resolve the issue. As Elena Tralwyn from HowStuffWorks explains:
"If a bulb pops out easily or feels loose, replace it. A bad one or even one lamp out of place can interrupt the flow of electricity."
Once you’ve checked all the bulbs, plug the strand back in and see if it lights up.
If reseating the bulbs doesn’t solve the problem, inspect each one for signs of damage. For incandescent bulbs, look for darkened glass or broken filaments. LED bulbs, on the other hand, may show cracked lenses or housing. Replace any damaged bulbs, ensuring the replacements match the original specifications.
To remove a bulb, gently push the two small copper wires at its base and pull it straight out. Align the copper wires of the new bulb with the socket holes and press it firmly into place.
If replacing damaged bulbs doesn’t fix the issue, it may be time to troubleshoot strands with multiple sections.
If only part of the strand is dark, the wiring design could be the issue. Incandescent strands are often wired in a single series, meaning one bad bulb can knock out the whole string. LED strands, however, typically use multiple series-wired sections connected in parallel, so a failure usually affects only one section.
To pinpoint the faulty bulb quickly, use a non-contact voltage detector or a Christmas light tester (these cost around $25–$30). Start at the working section and move toward the dark area. The tester will stop beeping at the point of failure. As Mr. Electric explains:
"The dead section of wire will be the section after your bad bulb."
If you don’t have a tester, you can manually replace bulbs one at a time, plugging in the strand after each swap until the dark section lights up.
Decide whether to fix or discard your lights based on the issues you found during the inspection.
Once you’ve replaced any faulty bulbs or blown fuses, plug the strand back in and test it. Every repair should be followed by a quick retest to ensure the issue is resolved. Make sure any replacement bulbs match the original voltage and type. If the strand has flasher bulbs that don’t fit properly, swap them out for standard ones. Avoid splicing out dead sections of the strand – this can mess with the voltage distribution and even create a fire hazard.
If your repairs don’t bring the lights back to full working order, it’s time to let them go. Strands with cracked or frayed insulation, melted plugs, or fuses that keep blowing should be discarded. Similarly, LED strings with rectifiers that can’t be repaired should also be retired.
When throwing out a damaged strand, be sure to cut off the plug first. This step prevents anyone from salvaging and using lights that are no longer safe.
After ensuring your lights are in good condition, proper storage will help them last longer. Instead of tightly winding them into balls, loosely coil the strands. Jared Hendricks of Christmas World offers this advice:
"If you wrap your light strands too tightly, you can damage the delicate wires within."
Place your coiled lights in a sturdy, airtight plastic bin and store them in a cool, dry area like a closet or a climate-controlled basement. Avoid attics or sheds, as temperature fluctuations can cause insulation to crack and connections to corrode. Toss a few silica gel packs into the bin to absorb moisture. For easy organization, label each container with details like "Front Porch" or "Roofline" to make next year’s setup simpler.
Carefully inspecting and repairing your lights ensures a stunning and safe holiday display. By following these five straightforward steps, you can keep your lights reliable and reduce potential hazards throughout the festive season.
Electrical issues are responsible for an average of 160 holiday home fires every year. Taking a few minutes to check your lights can significantly lower that risk.
Routine maintenance also helps you save money by addressing minor issues before they escalate into costly replacements. With LEDs offering an impressive lifespan of 25,000 to 50,000 hours, properly maintained lights can brighten your holidays for years to come. Once your display is ready, consider sharing it on Christmas Light Guide to spread the joy with your neighbors.
Safe, well-maintained lights ensure your holiday display truly shines.
Indoor Christmas lights are specifically made for use inside and aren’t built to withstand outdoor conditions like rain, snow, or high humidity. These lights lack waterproofing and may not cope well with temperature fluctuations, which can lead to serious risks like electrocution or even fire. Even if you’re using a GFCI outlet, it’s still unsafe to use indoor lights outdoors since they aren’t designed or rated for such environments, making them prone to damage and potential hazards.
If the fuse in your Christmas lights keeps blowing, it’s a sign that too much electrical current is passing through the circuit. This can happen for several reasons: overloading the circuit, faulty wiring, or a damaged bulb causing a short circuit. Start by replacing the fuse with one that has the same rating. If the new fuse blows again, inspect the lights carefully for problems like damaged bulbs or frayed wiring. Addressing these issues is crucial to avoid potential safety risks.
When connecting light strands, the number you can safely link together depends on the manufacturer’s instructions for your specific product. Generally, it’s a good idea to limit connections to three strands in a row to prevent electrical problems. Always verify the maximum length approved for your lights to keep things safe.